DIY Woopsie Witch Halloween Decoration
Transform your home into a spellbinding haven of spookiness with our DIY Woopsie Witch Halloween Decoration project. In this fun and easy tutorial, we’ll show you how to create a comically eerie witch who’s had a little mishap, adding a whimsical twist to your Halloween decor.
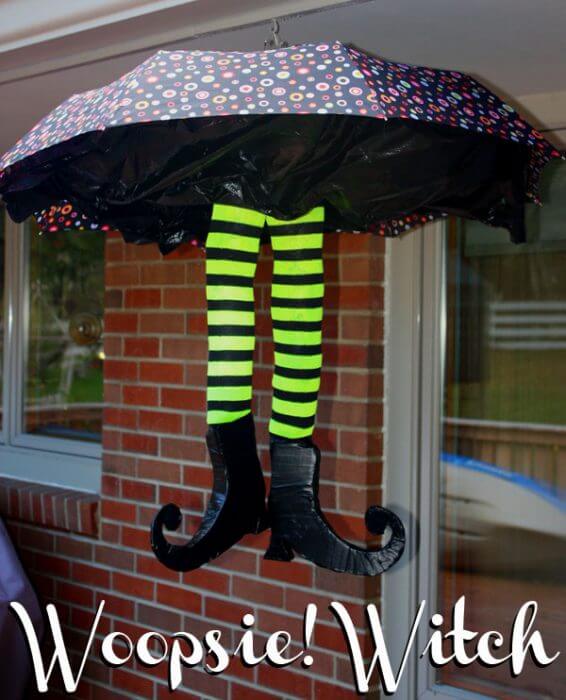
DIY Woopsie Witch
Have some fun this Halloween with a Woopsie Witch of your own! She’s easy to make, especially if you buy pre-made boots. With the exception of the stockings, you probably have everything you need to make her, around your house. I bought some cute witch boots at a craft store that was having a big Fall sale so I assumed they were on sale (Halloween is Fall, right?!). So I get home and realize that I paid full price for them ($20) and the store was an hour away. Being the thrifty (aka cheap) person I am, I opted to take a few hours and make the boots myself. I’ll include the entire step-by-step for my fellow frugal friends but if you find some boots that you’d rather use, this craft will take no time at all.
Supplies needed to make the DIY Woopsie Witch:
Kid or Adult Halloween tights
Black duct tape or electrical tape, 1 roll
Old umbrella
Black trash bag
Household stapler
Scissors
Xacto Knife
Cardboard shipping box (nice, rigid one)
Plastic shopping bags
Large safety pin (about 1.5″ long or so)
Instructions for making your own boots:
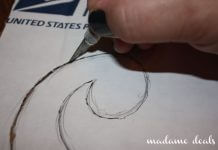
1. Flatten cardboard box and freehand draw (or trace from a printout via google images) a funky witch boot.
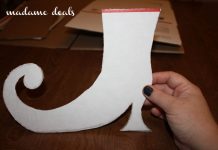
2. Using the Xacto, carefully cut out your boot.
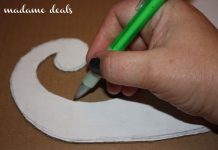
3. Use this boot as a template to trace another boot on another piece of the cardboard. Then cut it out. Repeat this until you have 4 boots cut out.
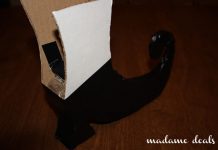
4. Match up a pair of boots, placing them against each other so they are the same. Tape the curly toes of the boot with the black tape.
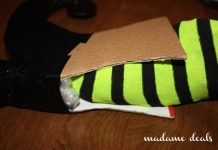
5. Take a rigid piece of cardboard and cut a piece about 1/2 to 2″ long by 1/4 to 1/2″ wide. You will need two of these. They will be placed toward the heel of the shoe to keep it open and supported. See photo. Tape that to the insides of the boot.
6. Begin stuffing the boots, from the toes toward the heel, with the balled up shopping bags. Only add 1 or 2 at a time, then wrap the boots with tape. The shopping bags bulk up the boot and give it support.
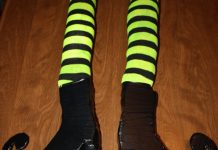
7. Keep wrapping the boots with tape until the entire surface is covered, black and resembles a boot. Before you get to the top, insert a stuffed stocking leg into the boot. As you are taping, tape the stocking into the boot.
Instructions for making the stuffed stockings:
1. Snip off the panty portion of the stockings and discard.
2. Ball up plastic shopping bags and stuff into the stockings until they are rather firm and leg-like.
3. When you have the desired length, tie of the ends. Try to make them uniform in size.
Instructions for the “dress”:
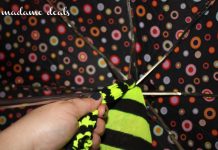
1. Open an umbrella and cut the center bar off below the part where the opened umbrella catches. Leave about 2″ below the part that secures the opened umbrella. Wrap this sharp end with tape until it’s soft.
2. Clip the safety pin to the outside middle of the umbrella so it can hang later. It needs to support a fair amount of weight, so make sure to use a large safety pin and secure it to one or two of the umbrella ‘skeleton’ for extra support.
3. Tie the legs onto the inside of the umbrella frame, apart from each other.
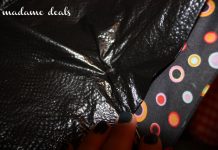
4. Spread out the garbage bag on top of the inside of the umbrella and place the legs over. Begin attaching the garbage bag to the skeleton of the frame with staples. This is best done by taking a piece of the bag under the frame of the umbrella, then meeting with the bag and placing the staple at that point, instead of stapling through the fabric of the umbrella. See photo.
5. Continue securing the bag to the frame of the umbrella until you have hidden the umbrella workings.
6. Hang the witch from a large cup hook or outdoor hook, attaching to the safety pin. Make any adjustments to her skirt and legs to make it hang the way you like.
This project took me a few hours, because I made the boots. Without that, it probably would have taken an hour or so. It really makes a fun indoor or outdoor Halloween project and something that will get a few giggles. This makes a cute classroom decoration too! I hope you have fun with it and it gets you lots of compliments!

Easy Halloween Sugar Skull Make Up for Kids
Easy Halloween Makeup for kids: Peacock edition
Comic Book Character Make up for Kids
DIY Candy Corn Wreath Halloween Decoration
DIY Witch Legs Homemade Outdoor Halloween Decorations

Cook, Baker, Phototaker, Fitness Mover and Shaker, Cupcake Tester, Deal Maker, Adventurous Undertaker, Do Good “Deeder”, Teacher, Mom, Wife, Patriot for Life & Giver of Good Advice – RealAdviceGal


